 Save
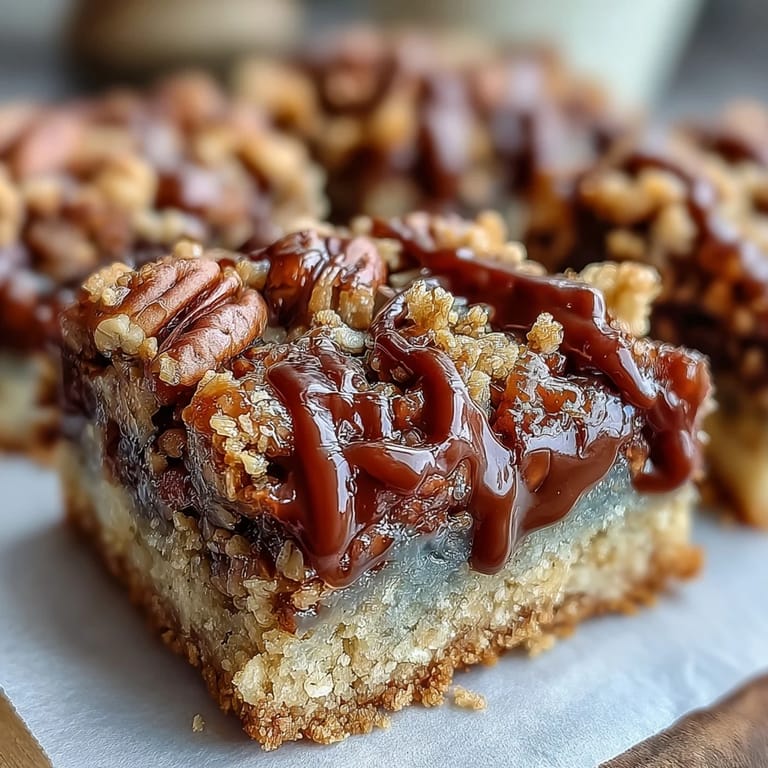
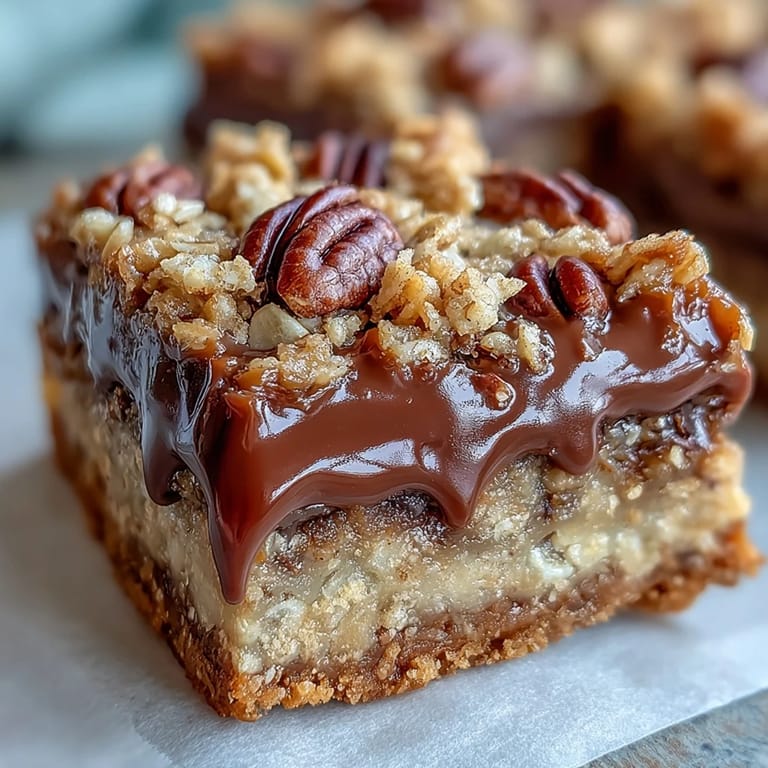
Save My neighbor knocked on the door holding an empty plate, asking if I had the recipe for those bars with the gooey middle. I had brought them to a potluck three days earlier, and apparently her kids wouldn't stop talking about them. That's when I knew these turtle bars weren't just another dessert. They're the kind of treat that lingers in memory long after the last crumb is gone, with caramel that refuses to stay put and chocolate that melts into every corner.
I made these for my son's bake sale on a rainy Tuesday morning, and by the time I arrived, two other parents were already hovering near the table. One of them asked if I'd consider making a double batch for the upcoming fundraiser. The bars had sold out in under twenty minutes, and I found myself scribbling the recipe on the back of a permission slip in the school hallway. That's the power of a dessert that looks as indulgent as it tastes.
Ingredients
- All-purpose flour: Forms the backbone of the crust and topping, providing structure without heaviness when mixed with oats.
- Rolled oats: These add chewiness and a rustic texture that makes the bars feel substantial and wholesome.
- Brown sugar: Contributes deep molasses notes and moisture that keep the crust tender even after cooling.
- Granulated sugar: Balances the brown sugar and helps the topping achieve that golden, slightly crisp finish.
- Unsalted butter, melted: Binds the crumb mixture and adds rich flavor, melted so it distributes evenly without overworking the dough.
- Salt: A small amount sharpens all the sweet flavors and keeps the bars from tasting flat.
- Baking soda: Helps the crust and topping brown beautifully and adds a slight lift.
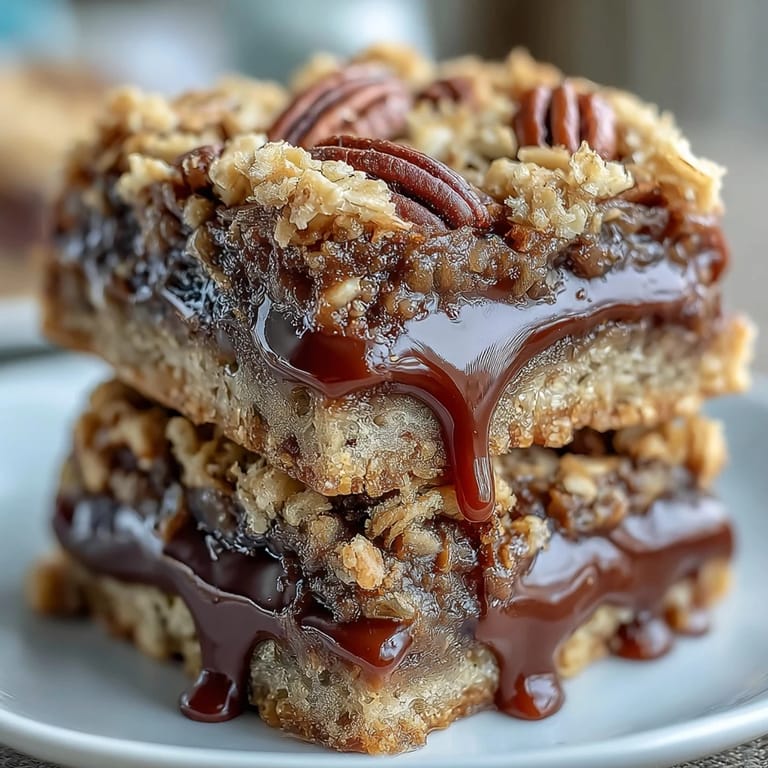
- Semi-sweet chocolate chips: They melt into puddles of chocolate that seep into the crust and mingle with the caramel.
- Chopped pecans: Toasted or raw, they deliver that essential nutty crunch and turtle candy nostalgia.
- Caramel sauce: The star of the filling, whether homemade or store-bought, it should be thick enough to cling but pourable when warm.
- Heavy cream: Loosens the caramel just enough to spread smoothly and adds a silky richness.
Tired of Takeout? 🥡
Get 10 meals you can make faster than delivery arrives. Seriously.
One email. No spam. Unsubscribe anytime.
Instructions
- Prepare the Pan:
- Preheat your oven to 350°F and grease a 9x9-inch baking pan generously with butter, or line it with parchment paper for easy removal. I like to leave a little overhang on two sides so I can lift the whole block out later and cut clean squares.
- Mix the Crumb Base:
- In a large bowl, stir together the flour, oats, both sugars, melted butter, salt, and baking soda until the mixture looks like wet sand. It should clump when you squeeze it but still feel crumbly and loose.
- Form the Crust:
- Scoop out 1 cup of the crumb mixture and set it aside in a small bowl for the topping. Press the rest firmly and evenly into the bottom of your prepared pan, making sure there are no thin spots.
- Parcook the Crust:
- Slide the pan into the oven and bake for 10 minutes, just until the edges start to turn golden. This step sets the base so it doesn't get soggy under all that caramel.
- Make the Caramel Layer:
- While the crust bakes, combine the caramel sauce and heavy cream in a small saucepan over medium-low heat. Stir constantly until the mixture is smooth, glossy, and just starting to bubble at the edges, then pull it off the heat.
- Add the Fillings:
- When the crust comes out of the oven, immediately scatter the chocolate chips evenly over the hot surface, then sprinkle the chopped pecans on top. The residual heat will start melting the chocolate right away.
- Pour the Caramel:
- Slowly drizzle the warm caramel sauce over the chocolate and pecans, using a spoon to guide it into any bare spots. Don't worry if it looks messy, the topping will cover it.
- Add the Crumb Topping:
- Sprinkle the reserved crumb mixture evenly over the caramel layer, pressing down very gently with your fingers so it adheres. It should look like a cobbler topping, with some gaps where the caramel peeks through.
- Finish Baking:
- Return the pan to the oven and bake for 15 to 20 minutes, until the topping turns a deep golden brown and the caramel is bubbling at the edges. The smell will be intoxicating.
- Cool Completely:
- Set the pan on a wire rack and let it cool completely before cutting, at least 30 minutes. I know it's hard to wait, but warm bars will fall apart and the caramel needs time to set.
 Save
Save I brought a pan of these to a friend's birthday dinner, and by the end of the night, three people had taken photos of the bars before eating them. One guest admitted she'd never made a layered dessert before because she assumed it was too complicated. When I told her it was just press, sprinkle, pour, and bake, she looked at me like I'd handed her a secret. Sometimes the most impressive recipes are the ones that don't ask for much.
How to Store and Serve
These bars keep beautifully in an airtight container at room temperature for up to a week, though they rarely last that long in my house. If you want to make them ahead, you can freeze the whole uncut block wrapped tightly in plastic wrap and foil for up to three months. Let it thaw in the fridge overnight, then bring it to room temperature before slicing. For an extra touch, drizzle melted chocolate over the top in thin lines before serving, it makes them look like something from a fancy dessert case.
Swaps and Variations
Walnuts or almonds work just as well as pecans if that's what you have on hand, and I've even used hazelnuts once when I was feeling adventurous. For a salted caramel version, sprinkle a generous pinch of flaky sea salt over the caramel layer before adding the crumb topping. If you want to make your own caramel sauce, go for it, but honestly, a good-quality store-bought jar saves time and tastes just as indulgent. Dark chocolate chips will make the bars a little less sweet and more sophisticated, which some people prefer.
What You'll Need in the Kitchen
A 9x9-inch baking pan is essential for the right thickness, anything larger will give you thin, crispy bars instead of chewy ones. You'll need a couple of mixing bowls, one large for the crumb mixture and one small for the reserved topping. A small saucepan is necessary for warming the caramel, and a wooden spoon or spatula will keep you from scratching it. Don't forget a wire rack for cooling and a sharp knife for cutting once everything has set.
- Use parchment paper with overhang for the easiest cleanup and cleanest cuts.
- A bench scraper or offset spatula helps press the crust evenly without warming it with your hands.
- Keep a damp towel nearby to wipe your knife between cuts for professional-looking squares.
 Save
Save There's something deeply satisfying about pulling a pan of these out of the oven and watching the caramel bubble up through the crumb topping. They're proof that a little patience and a few quality ingredients can turn an ordinary afternoon into something worth remembering.
Recipe FAQs
- → How do I know when the bars are fully baked?
The topping should turn golden brown, and you might see slight bubbling around the edges from the caramel. The center will still feel slightly soft due to the chocolate and caramel layers, which is normal.
- → Can I make these bars ahead of time?
Yes, these actually improve after resting for a day. Store in an airtight container at room temperature for up to one week. The flavors meld together beautifully over time.
- → What's the best way to cut clean squares?
Wait until completely cooled, at room temperature. Use a sharp knife wiped clean between cuts. For extra neat squares, chill for 30 minutes before slicing, though this makes them slightly firmer.
- → Can I use homemade caramel sauce?
Absolutely. Homemade caramel works wonderfully and often has deeper flavor. Just ensure it's pourable but not too thin when mixed with the cream—it should coat a spoon nicely.
- → What other nuts work well in these bars?
Walnuts or almonds make excellent substitutions. Walnuts have a slightly earthier flavor that complements the caramel, while almonds add a classic nutty crunch.
- → Why do I need to add cream to the caramel?
The heavy cream thins the caramel sauce slightly, making it easier to pour evenly over the chocolate and pecans. It also adds richness and prevents the caramel from becoming too hard when baked.