 Save
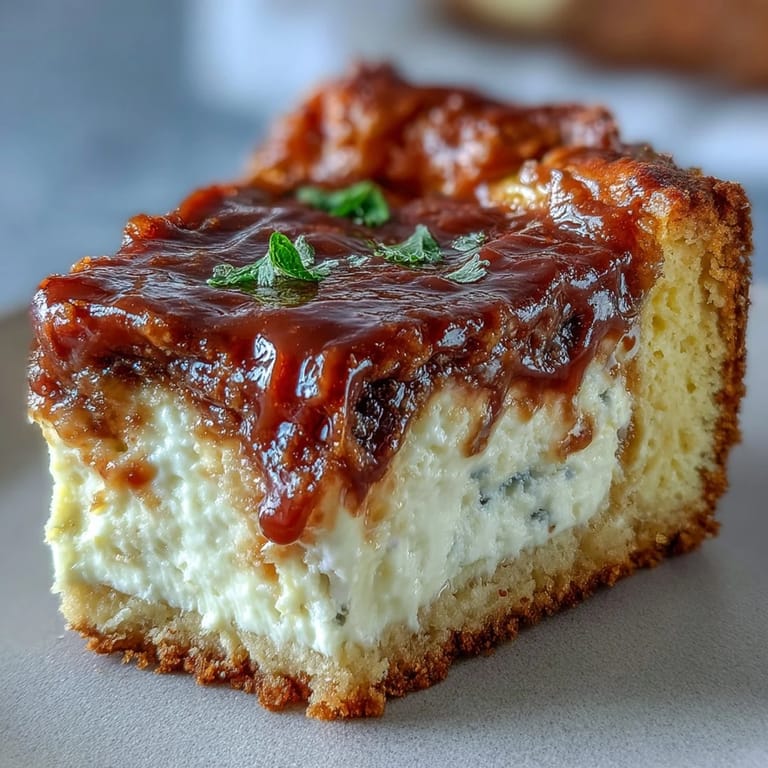
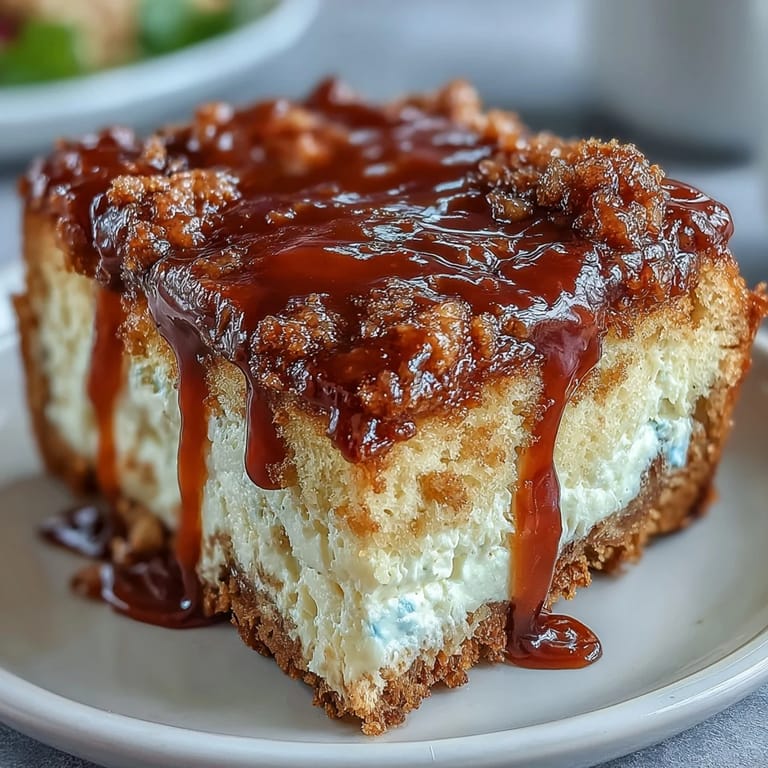
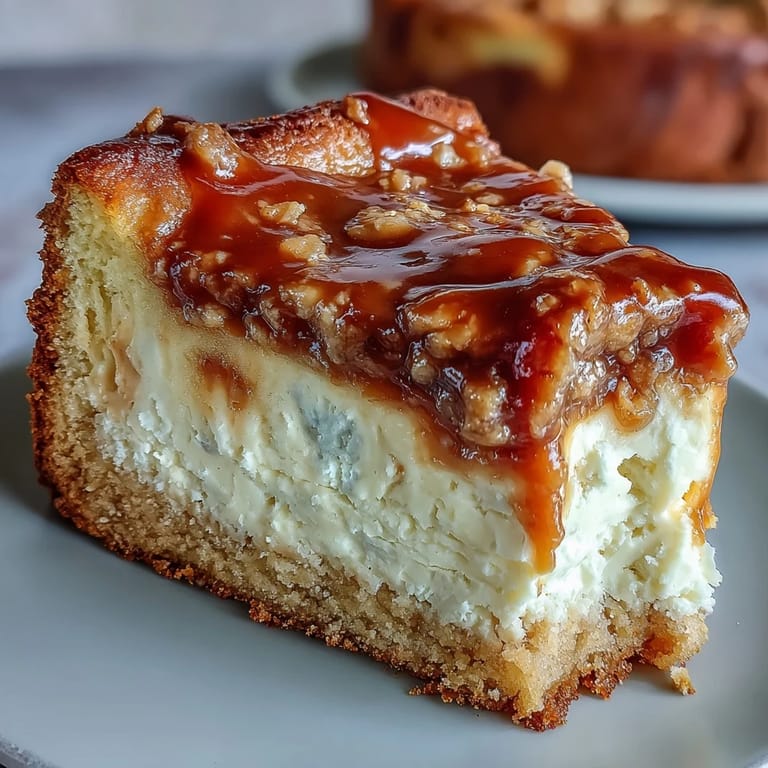
Save My kitchen smelled like a bakery having a love affair with a candy shop the first time I pulled these loaves from the oven. The caramel had puffed and crackled on top, forming these gorgeous amber streaks that looked almost too pretty to cut into. I'd been skeptical about the cream cheese layer staying put, but when I sliced through, there it was: a perfect ribbon of tangy sweetness running straight down the middle. My neighbor wandered over following the smell and left with half a loaf tucked under her arm. I didn't even get a chance to wrap it.
I made this for a birthday breakfast once, and it completely stole the show from the actual cake. People kept coming back for thin slices, then thicker ones, then just standing at the counter with a knife. The cream cheese filling stays cool and creamy even when the bread is warm, which creates this incredible contrast in every bite. It's the kind of recipe that makes people ask if you went to culinary school, and you get to smile and say it took ten minutes to mix.
Ingredients
- Light brown sugar: This is what gives the bread its deep, molasses-kissed sweetness and keeps it incredibly moist for days.
- All-purpose flour: The backbone of the loaf; measure it correctly by spooning it into the cup and leveling off, never scooping directly.
- Baking powder: Make sure it's fresh or your loaves won't rise properly, I learned that the hard way with flat, dense bricks.
- Eggs: Use them at room temperature so they blend seamlessly into the batter without creating lumps.
- Milk: Whole milk makes it richer, but I've used oat milk in a pinch and it still turned out beautifully.
- Vegetable oil: Keeps the crumb soft and tender; melted butter works too but the texture is slightly denser.
- Cream cheese: Must be softened or you'll have lumps in your filling, leave it out for at least 30 minutes before starting.
- Caramel sauce: I use store-bought because life is short, but homemade adds a special touch if you're feeling ambitious.
Tired of Takeout? 🥡
Get 10 meals you can make faster than delivery arrives. Seriously.
One email. No spam. Unsubscribe anytime.
Instructions
- Prep Your Pans:
- Grease those loaf pans generously with butter or nonstick spray, getting into every corner. If you skip this step, you'll be chiseling bread out later and cursing quietly.
- Mix the Dry Base:
- Whisk the brown sugar, flour, baking powder, and salt until there are no clumps of sugar hiding in the corners. This ensures even sweetness in every bite.
- Combine the Wet Ingredients:
- Beat the eggs, milk, and oil together until they look unified and slightly frothy. This takes about 30 seconds with a hand mixer or a vigorous minute by hand.
- Bring It Together:
- Pour the dry ingredients into the wet and stir just until you don't see flour anymore. Overmixing creates tough, chewy bread instead of tender crumb.
- Divide the Batter:
- Scoop half the batter into your two pans, spreading it gently to the edges. Leave room at the top; these babies rise beautifully.
- Whip the Cream Cheese Filling:
- Beat the softened cream cheese, sugar, and egg until it's silky and smooth with no lumps. This is your secret cheesecake center.
- Create the Swirl:
- Spoon the cream cheese mixture in a thick line right down the middle of each pan. Don't spread it, just let it sit there like a ribbon.
- Top and Seal:
- Gently spoon the remaining batter over the cream cheese, covering it completely. Use the back of your spoon to smooth the top.
- Add the Caramel Magic:
- Drizzle caramel sauce in a zigzag or straight line over the top, then take a knife and gently swirl it in. Two or three swirls are plenty; don't go overboard or it disappears into the batter.
- Bake Until Golden:
- Slide the pans into your preheated oven and bake for 50 minutes. The tops should be golden and a toothpick should come out with just a few moist crumbs.
- Cool and Release:
- Let the loaves cool in the pans for 10 minutes, then turn them out onto a wire rack. If you try to slice them hot, they'll fall apart in your hands.
 Save
Save One Saturday morning, I served thick slices of this with strong coffee and watched my teens actually sit at the table instead of grabbing and running. They argued over who got the middle slices with the most cream cheese, and for once I didn't mind the bickering. It's become our weekend tradition now, and I usually make a double batch so there's one loaf in the freezer for emergencies or unexpected guests who show up sniffing the air.
Storing and Freezing
This bread stays moist for up to four days wrapped tightly in plastic wrap on the counter. I've found that the caramel actually gets chewier and more intense on day two, which makes it even better for breakfast. If you want to freeze it, wrap each loaf in plastic, then foil, and it'll keep for up to three months. Thaw it overnight on the counter and warm slices in the toaster for that just-baked experience all over again.
Variations Worth Trying
I've stirred chopped pecans into the batter for crunch, swapped the caramel for chocolate sauce when I was feeling wild, and even added a pinch of cinnamon to the cream cheese filling. Mini loaf pans make these perfect for gift-giving, and muffin tins turn them into grab-and-go breakfasts that disappear faster than I can bake them. You can also drizzle extra caramel or a simple powdered sugar glaze over the cooled loaves if you want to go full dessert mode.
Serving Suggestions
I love serving this barely warm with salted butter melting into the slices, but it's also incredible toasted the next day with a smear of cream cheese. It pairs beautifully with fresh berries and whipped cream for a fancy brunch, or just a big mug of coffee for a quiet morning alone. Some people in my house eat it cold straight from the fridge at midnight, and I've stopped judging because I've done the same.
- Toast slices and top with a drizzle of honey and flaky sea salt for a sweet-salty breakfast.
- Serve it alongside scrambled eggs and bacon for a complete brunch spread.
- Cube it and use it as the base for a decadent bread pudding.
 Save
Save This bread has become my answer to almost every occasion: hostess gifts, bake sales, apology offerings, and Tuesday mornings when I need something beautiful to look forward to. I hope it becomes one of those recipes you make so often you stop measuring and just know it by heart.
Recipe FAQs
- → Can I use homemade caramel sauce instead of store-bought?
Yes, homemade caramel sauce works beautifully and may add even richer flavor. Just ensure it has cooled slightly before swirling into the batter to prevent melting the cream cheese layer.
- → How do I know when the bread is fully baked?
Insert a toothpick into the center—it should come out mostly clean. Some cream cheese residue is acceptable, but wet batter means it needs more time. The top should be golden brown and the edges slightly pulled away from the pan.
- → Can I freeze this bread?
Absolutely. Wrap cooled loaves tightly in plastic wrap and aluminum foil, then freeze for up to 3 months. Thaw overnight at room temperature before serving. Individual slices also freeze well for quick portions.
- → Why is my bread dense or heavy?
Overmixing the batter creates gluten development leading to dense texture. Mix just until combined. Also ensure your baking powder is fresh and measure flour properly by spooning into measuring cups rather than scooping directly.
- → Can I make this into muffins or mini loaves?
Yes. For mini loaves, use six pans and reduce baking time to approximately 40 minutes. For standard muffins, fill tins two-thirds full and bake for 12-15 minutes. Adjust time as needed based on your specific pans.
- → What's the best way to swirl the caramel?
Use a thin knife to make gentle figure-eight motions through the batter just once or twice. Avoid over-swirling, which blends the layers too much. The goal is distinct ribbons of caramel throughout, not a uniformly mixed batter.