 Save
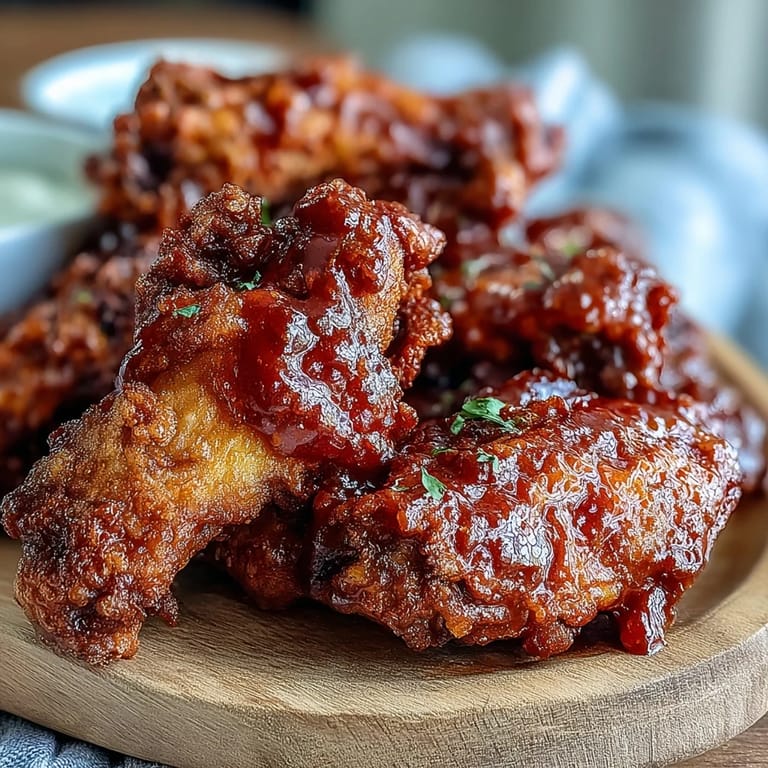
Save The oil was just starting to shimmer when my neighbor knocked on the door, drawn by the smell already sneaking through the hallway vents. I had promised her I would finally share my method for truly crispy wings, the kind that stay crunchy even after tossing in sauce. That afternoon, with a tray of golden wings cooling on the rack and three different sauces waiting in bowls, I realized this recipe had become my most requested dish without me even noticing. Sometimes the best recipes are the ones that make people show up unannounced.
I started making these for game days, but they quickly became my go to whenever I needed to feed a crowd without much fuss. One summer evening, I set up a little wing bar on the back patio with all three sauces, celery sticks, and a bucket of icy drinks. My friends argued good naturedly over which sauce was superior while I just kept frying batch after batch, happy to let the food do the talking. That night taught me that the best entertaining happens when the cook is relaxed and the food is impossible to resist.
Ingredients
- Chicken wings: Look for wings that are already separated into drumettes and flats to save yourself the knife work, and make sure they are fully thawed and patted dry before marinating.
- Buttermilk: This is the secret to tender, flavorful meat, its acidity breaks down the proteins gently and adds a subtle tang that balances the richness of frying.
- Garlic powder and onion powder: I learned to use powders instead of fresh here because they distribute evenly and will not burn in the hot oil like minced garlic would.
- Cornstarch: Adding this to the flour makes the coating shatter crisp, it is a trick I picked up from Chinese cooking and it works beautifully on fried chicken.
- Baking powder: Just a teaspoon creates tiny air pockets in the crust that puff up during frying, giving you that light, crunchy texture instead of a dense shell.
- Hot sauce and butter: The classic Buffalo combination, the butter mellows the heat and helps the sauce cling to every ridge of the crispy coating.
- Thai sweet chili sauce: I keep a bottle in the fridge at all times now, it brings sweet, tangy, and just enough heat without overpowering the chicken.
- BBQ sauce: Use whatever brand makes you happy, I have tried fancy small batch and basic supermarket and honestly both work great when the wings are this good.
Tired of Takeout? 🥡
Get 10 meals you can make faster than delivery arrives. Seriously.
One email. No spam. Unsubscribe anytime.
Instructions
- Marinate the Wings:
- Pour the buttermilk over the wings in a big bowl, then sprinkle in all the spices and mix everything with your hands so each piece gets coated. Cover the bowl and let it sit in the fridge for at least half an hour, though I have left it overnight and the wings only got better.
- Prepare the Coating:
- Whisk the flour, cornstarch, and baking powder together in a shallow dish until there are no lumps. This dry mixture is what will transform into that golden, crackly shell.
- Coat the Wings:
- Pull each wing out of the marinade, shake off the excess, and press it firmly into the flour mixture until it looks shaggy and well covered. Let the coated wings rest on a wire rack for ten minutes so the coating can set and adhere properly.
- Heat the Oil:
- Pour enough oil into your pot to come up about two inches and clip a thermometer to the side. Heat it slowly to 175 degrees Celsius, patience here means even cooking and less splattering later.
- Fry the Wings:
- Slide in only as many wings as will fit comfortably without touching, then leave them alone for a few minutes before turning. Fry each batch for eight to ten minutes until they are deep golden and crispy, then lift them out onto a wire rack to drain.
- Make the Sauces:
- Whisk the Buffalo ingredients in one bowl, stir the Thai mixture in another, and pour the BBQ into a third. Having all three ready means you can toss the wings the moment they come out of the oil.
- Toss and Serve:
- Divide the fried wings into three portions and toss each one in a different sauce, or just set the sauces out and let everyone dip as they please. Scatter some sliced chives over the top and serve with celery sticks and a cool creamy dressing on the side.
 Save
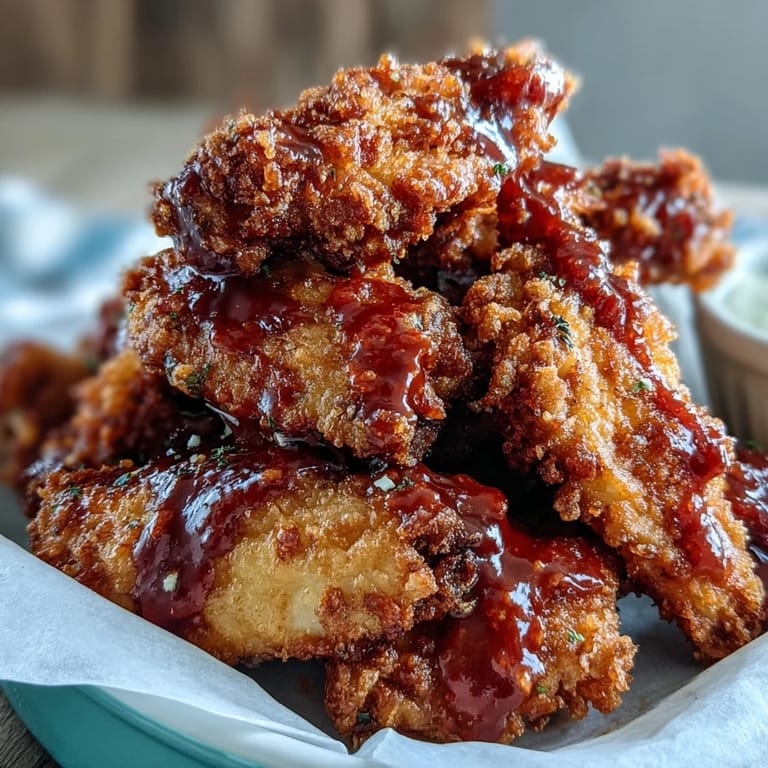
Save The first time I made these for my brother, he ate seven wings before he even tried the second sauce. He looked up, fingers sticky with Buffalo, and said these were better than any restaurant version he had ever had. I did not tell him how simple the recipe actually was, I just smiled and passed him more napkins. That is the thing about really good fried chicken, it does not need to be complicated to make people ridiculously happy.
Getting the Crispiest Crust
The double fry method mentioned in the notes is worth trying if you have the time and patience. Fry the wings at a lower temperature first to cook them through, let them rest and cool for at least ten minutes, then hit them with a second quick fry at higher heat to crisp up the exterior. The result is wings with an almost glass like crunch that stays intact even after sitting for a while. I save this technique for special occasions when I really want to show off, but the single fry method in the main recipe is excellent for everyday cooking.
Choosing Your Sauce Adventure
I used to think I had to pick one sauce and commit, but offering all three turned wing night into something more fun and interactive. The Buffalo is for purists and heat seekers, the Thai appeals to anyone who loves sweet and tangy, and the BBQ is the safe crowd pleaser that even kids enjoy. Sometimes I put out all three and a plate of naked fried wings so people can mix and match or try a different flavor with each piece. It turns a simple snack into a tasting experience without any extra work.
Storing and Reheating
Fried wings are always best straight from the oil, but leftovers can be saved if you store them properly. Let them cool completely, then pack them in an airtight container and refrigerate for up to three days. To reheat, spread them on a wire rack over a baking sheet and warm them in a 200 degree Celsius oven for about ten minutes until heated through and the crust crisps up again. The microwave will make them soggy, so resist the temptation even when you are in a hurry.
- If you are meal prepping, fry the wings and store them plain, then toss with sauce just before serving.
- Freeze uncooked marinated wings in a single layer on a tray, then transfer to a freezer bag for up to three months.
- Always bring wings to room temperature for fifteen minutes before frying so they cook evenly.
 Save
Save There is something deeply satisfying about pulling off restaurant quality wings in your own kitchen, especially when you can do it in under an hour. These have become my answer to lazy Sundays, unexpected guests, and that very specific craving for something crispy, salty, and completely indulgent.
Recipe FAQs
- → How do I make the wings extra crispy?
For maximum crispiness, use the double-fry method: fry once at 150°C (300°F) for 7 minutes, let cool completely, then fry again at 190°C (375°F) for 2-3 minutes. The cornstarch and baking powder in the coating also help achieve crunchiness.
- → Can I bake these wings instead of frying?
Yes, arrange coated wings on a wire rack over a baking sheet and bake at 220°C (425°F) for 40-45 minutes, flipping halfway through. They won't be quite as crispy as fried, but still delicious.
- → What's the best oil temperature for frying wings?
Maintain oil temperature at 175°C (350°F) for perfectly cooked wings. Too low and they'll absorb oil and become greasy; too high and they'll burn outside while remaining raw inside. Use a thermometer for accuracy.
- → Can I prepare the wings ahead of time?
Yes, marinate wings up to 24 hours in advance for deeper flavor. You can also coat them in flour mixture up to 2 hours ahead and refrigerate uncovered, which helps dry the coating for extra crispiness.
- → What can I substitute for buttermilk?
Mix 1 cup regular milk with 1 tablespoon lemon juice or white vinegar. Let sit for 5 minutes to curdle slightly before using. Plain yogurt thinned with a little milk also works well.
- → How do I know when the wings are fully cooked?
Wings are done when they reach an internal temperature of 75°C (165°F) and the juices run clear. They should be golden brown and crispy on the outside, taking about 8-10 minutes per batch.