 Save
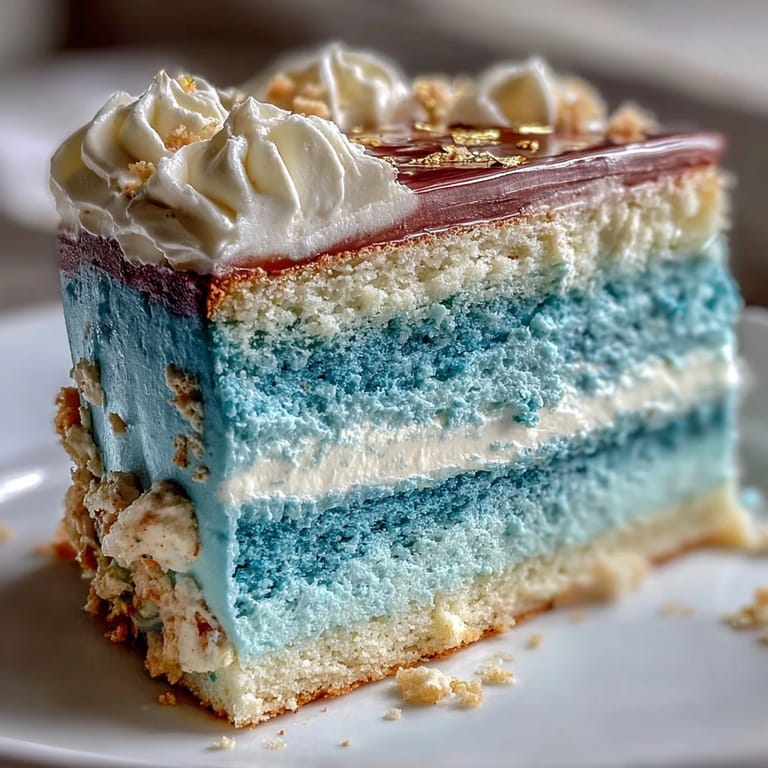
Save The first time I made this cake, the entire kitchen seemed charged with anticipation—my nephew was graduating, and blue and gold filled the house in streamers and balloons. The scent of vanilla, mingled with laughter and that nervous hush before a big milestone, set the scene for frosting adventures. I remember the hum of the mixer battling stubborn butter, and everyone craning necks over layers of blue batter, picking favorites by shade. Trying to make ombre shades wasn’t just a recipe step—each swirl became a little symbol of achievement. There’s something about baking a cake for graduation that feels more like building a centerpiece than following a formula.
When my best friend’s son walked through the door, wearing his cap askew and grinning at the cake, I knew the layers mattered less than the moment. The cake became a storytelling piece, where every gradient sparked conversation. We exchanged funny baking mishaps, from dropping eggs to mysterious fingerprints in the butter. By the time candles flickered, the cake was as much a part of the celebration as the diploma. Somehow, the gold streaks claimed the spotlight in every photo.
Ingredients
- All-purpose flour: Sifting the flour ensures a lighter crumb—don’t skip it, or the layers could turn dense.
- Baking powder and baking soda: Together, these keep the cake from collapsing and help build the soft layers you want for stacking.
- Unsalted butter: Room temperature butter is key for creaming; if too firm, it makes mixing tough and the cake less fluffy.
- Granulated sugar: Beat it into the butter until pale and airy—the difference shows in texture and taste.
- Eggs: Make sure they’re room temp, or your batter might curdle instead of blend.
- Pure vanilla extract: Real vanilla turns the buttercream from plain to luxurious—never settle for imitation.
- Whole milk: Don’t rush warming it up; cold milk slows the batter and creates dense layers.
- Blue gel food coloring: Use gel for vibrant finished colors and avoid watery batter.
- Powdered sugar: Sifted, it keeps the buttercream velvety smooth rather than gritty.
- Dark blue gel coloring: For dramatic ombre, go bold—layer the tones with confidence.
- Edible gold leaf or gold dust: Handle gently and use tweezers; breaking up gold makes the decoration uneven.
- Clear alcohol (vodka or lemon extract): Perfect for dissolving gold dust and painting elegant streaks without melting the buttercream.
Tired of Takeout? 🥡
Get 10 meals you can make faster than delivery arrives. Seriously.
One email. No spam. Unsubscribe anytime.
Instructions
- Prep Your Pans:
- Grease all three pans and line the bottoms with parchment for easy release—they’ll save you headaches later.
- Mix Dry Ingredients:
- Whisk flour, baking powder, baking soda, and salt until evenly blended; listen for that soft, sandy sound.
- Cream Butter and Sugar:
- Beat until light and fluffy, scraping down the sides to keep the mixture even—watch for the pale color as a signal.
- Add Eggs and Vanilla:
- Crack in eggs one at a time, mixing each until just combined, followed by vanilla for aroma.
- Alternate with Flour and Milk:
- Add flour and milk in stages, starting and ending with flour; stop mixing as soon as the batter comes together.
- Color Your Batter:
- Divide into three bowls—add gel food coloring in increasing intensity for graduated blues, stirring gently to avoid streaks.
- Bake the Layers:
- Pour each colored batter into its pan, smooth tops, and bake until a tester comes out clean, about 25–30 minutes.
- Cool Completely:
- Let cakes cool in the pans briefly, then flip onto racks to finish cooling without sticking.
- Make the Buttercream:
- Beat butter until creamy, slowly add sifted powdered sugar, vanilla, salt, and milk—mix until smooth and easily spreadable.
- Tint Your Buttercream:
- Reserve a cup for crumb coating, then tint the rest deep blue; mix thoroughly for even color.
- Assemble and Layer:
- Trim cake tops if necessary, start with the darkest blue, frost, and repeat—build upward, saving the lightest blue for the crown.
- Crumb Coat and Chill:
- Spread a thin coat with reserved buttercream to trap crumbs, then chill so the final frost stays clean.
- Frost and Ombre:
- Smooth dark blue over the cake; gently blend lighter blues higher up for a seamless fade.
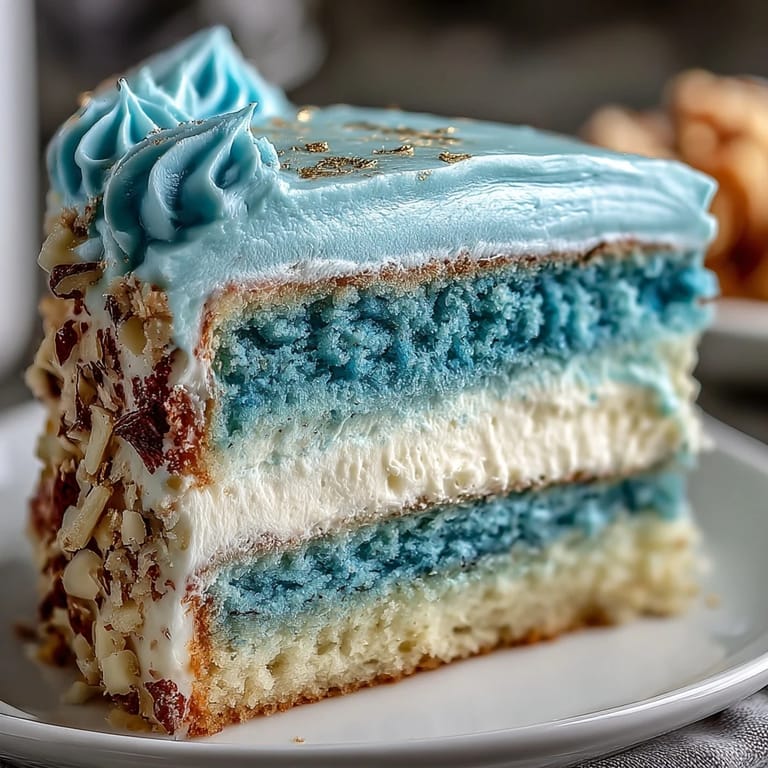
- Decorate in Gold:
- Apply gold leaf or brush gold dust accents wherever they catch the light; don’t stress perfection—the shimmer does the work.
- Chill and Serve:
- Refrigerate the finished cake until ready to slice; this keeps layers firm and decorations crisp.
 Save
Save After the party, I watched graduates sneak back for a second slice, their fingers trailing over gold accents and leaving tiny blue smudges on napkins. The leftover cake became a centerpiece for quiet kitchen conversations, as everyone reminisced about new beginnings. Somehow, sharing it transformed the celebration from a ceremony to a memory.
Make Your Ombre Layers Pop
Blending gel coloring is a little art form—add color gradually, and test a spoonful to check shade depth before proceeding. Don’t overmix; swirling a little keeps the batter lively and prevents dull layers. If you use a cake turntable, gently spin as you smooth the buttercream, making those colors fade naturally. It’s tempting to rush, but lingering over the ombre makes each layer feel special.
Choosing Your Gold Accents
Edible gold leaf is delicate and will break if handled with fingers—use tweezers for clean placement. Gold dust is easier for painting streaks or edges, especially when mixed with clear alcohol. Decide where light hits best for maximum shimmer. The kitchen window can turn a simple brushstroke into a spotlight.
Cake Assembly Made Easy
Stacking three layers takes patience—line up the edges and use a little extra buttercream for stability. If the cake leans, chill again before finishing the top layer. Rotating the cake while frosting makes the ombre blend smoother and reduces stress over visible seams.
- Use reserved buttercream to fill any gaps before the final coat.
- Keep a damp cloth nearby for cleaning gold streak mistakes.
- Chill between steps—rushing will blur your colors or crack the gold.
 Save
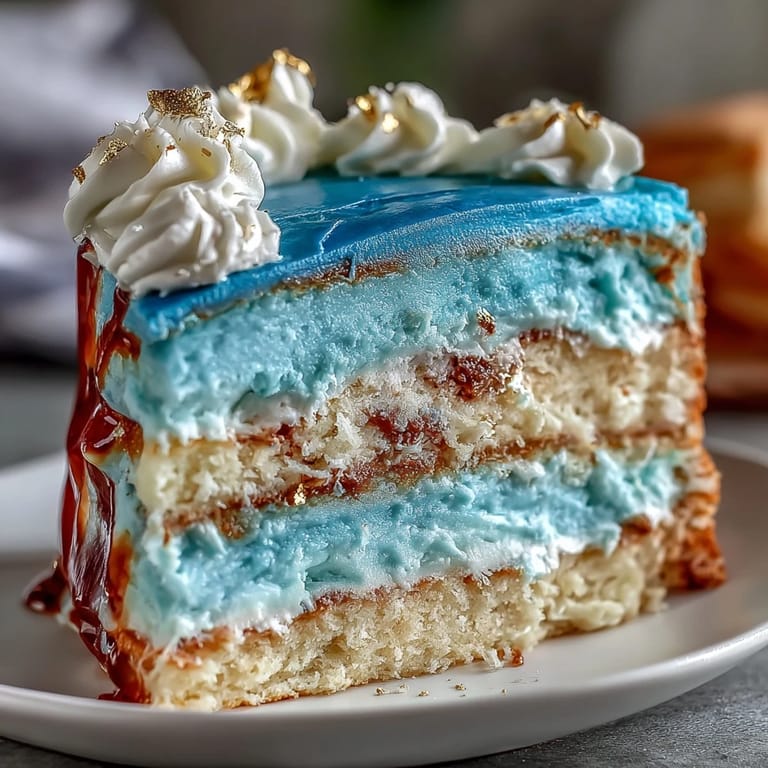
Save Graduation Cake for Boys is more than a centerpiece—it’s a badge of celebration, best sliced and shared with those you care about. Every shade and shimmer tells the story of a milestone earned.
Recipe FAQs
- → How do I achieve the ombre effect in cake layers?
Divide the batter into three bowls and use varying shades of blue food coloring for each, ranging from light to dark.
- → What ingredients create the rich buttercream frosting?
Butter, sifted powdered sugar, vanilla extract, milk or cream, and a pinch of salt combine for creamy buttercream.
- → How should I decorate with edible gold?
Apply edible gold leaf or brush gold dust mixed with clear alcohol onto the cake's surface for decorative streaks or edges.
- → Can I add more cake layers for a dramatic effect?
Yes, use four or five layers with increasing intensity of blue to enhance the ombre look.
- → What tools help make smooth frosting?
An offset spatula, electric mixer, and optional cake turntable assist with achieving a professional finish.
- → Is this cake suitable for vegetarians?
Yes, the ingredients are vegetarian-friendly; check gold decorations to ensure they meet dietary requirements.
- → How many servings does this cake provide?
The finished cake yields approximately twelve servings, ideal for celebratory gatherings.